How To Build A Koi Pond: Step-by-Step Guide for Beginners
Building a koi pond is a rewarding project. It adds beauty and tranquility to your garden.
A koi pond can transform your backyard into a peaceful retreat. Watching koi fish swim can reduce stress and bring joy. But how do you start building a koi pond? This guide will walk you through each step, ensuring you create a healthy environment for your koi.
From selecting the right location to adding the finishing touches, you will learn everything you need to know. With the right planning and effort, your koi pond will become a stunning feature of your home. Ready to dive in? Let’s get started!
Planning Your Koi Pond
Building a koi pond can bring tranquility and beauty to your garden. Planning your koi pond is a crucial first step to ensure it becomes a healthy and attractive home for your koi fish. Proper planning involves careful consideration of the location, size, and shape of your pond. Let’s dive into the details to help you get started.
Choosing The Right Location
Choosing the right location for your koi pond is essential for the health of your fish and the overall aesthetics of your garden. Consider these factors when selecting the best spot:
- Sunlight: Koi ponds need sunlight, but too much can cause excessive algae growth. Aim for a spot that gets partial sunlight.
- Proximity to Trees: Avoid placing your pond near trees. Falling leaves can contaminate the water and roots can damage the pond structure.
- Accessibility: Ensure the pond is easily accessible for maintenance and viewing. You’ll want to enjoy the sight of your koi fish without much effort.
- Safety: Consider the safety of children and pets. Choose a location that minimizes risk while still being enjoyable.
Here’s a quick table to summarize the factors:
| Factor | Consideration |
|---|---|
| Sunlight | Partial sunlight to prevent algae |
| Trees | Avoid falling leaves and roots |
| Accessibility | Easy for maintenance and viewing |
| Safety | Minimize risk to children and pets |
Determining Size And Shape
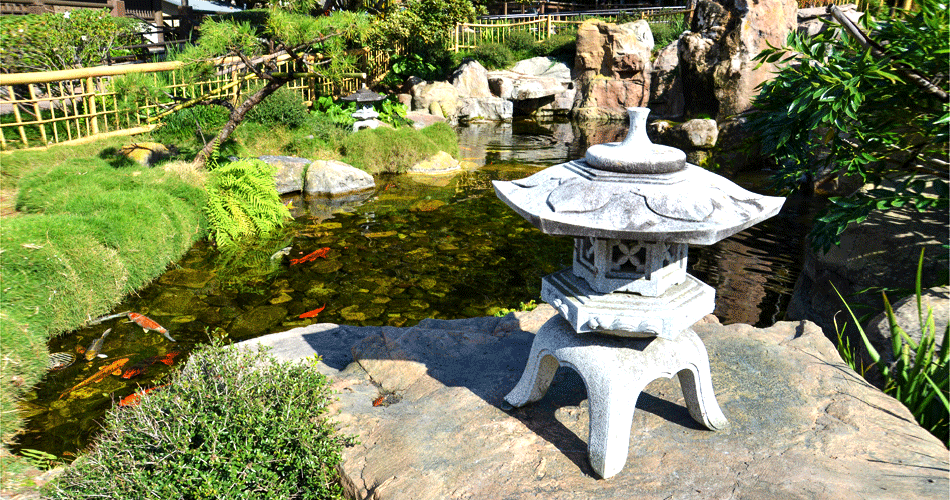
The size and shape of your koi pond will impact the well-being of your fish and the overall look of your garden. Here’s how to decide: Size: Koi fish need space to swim and grow. A larger pond is better, with a minimum depth of 3 feet to prevent freezing in winter and overheating in summer. The surface area should be at least 50 square feet. Shape: The shape of your pond can affect water flow and aesthetics. Common shapes include:
- Rectangular: Simple and easy to build, great for formal gardens.
- Kidney-shaped: Natural look, good for blending with the landscape.
- Round: Elegant and promotes good water circulation.
Here’s a table to help you compare the shapes:
| Shape | Advantages |
|---|---|
| Rectangular | Easy to build, formal look |
| Kidney-shaped | Natural look, blends with landscape |
| Round | Good water circulation, elegant |
Choose a size and shape that fits your space and meets the needs of your koi fish. Proper planning ensures a beautiful and healthy koi pond.
Essential Materials
Building a Koi pond requires careful planning and the right materials. Choosing the best materials is crucial for the health and beauty of your pond. This section will cover the essential materials you need to build a Koi pond, focusing on pond liners, filters, pumps, and aeration systems.
Pond Liners And Filters
Pond liners are essential to hold the water in your Koi pond and prevent leaks. They come in various materials, each with its benefits. Common types of pond liners include:
- EPDM Rubber Liners: Durable, flexible, and UV resistant. They are easy to install and long-lasting.
- PVC Liners: More affordable but less durable than EPDM. They can be prone to cracking in cold weather.
- HDPE Liners: High-density polyethylene liners are puncture-resistant and UV stable. They are a good option for larger ponds.
Filters are just as important as liners. They keep the water clean and clear by removing debris and harmful substances. There are two main types of filters:
- Mechanical Filters: These remove solid waste and debris from the water. They often include foam pads or brushes that trap particles.
- Biological Filters: These use beneficial bacteria to break down harmful chemicals like ammonia and nitrites. They help maintain a healthy environment for your Koi.
Choosing the right liner and filter will ensure your pond remains leak-free and the water stays clean, providing a healthy habitat for your Koi.
Pumps And Aeration Systems
Pumps and aeration systems are vital to maintain water movement and oxygen levels in your Koi pond. Without them, the water can become stagnant and oxygen-depleted, harming your fish. Pumps help circulate the water, ensuring it flows through the filter system and back into the pond. This circulation keeps the water clean and helps distribute oxygen. When selecting a pump, consider:
- Flow Rate: The pump should move at least half the pond’s volume per hour.
- Energy Efficiency: Look for energy-efficient models to save on operating costs.
- Durability: Choose a pump made from high-quality materials that can withstand continuous use.
Aeration systems provide additional oxygen to the water. This is especially important in warmer months when oxygen levels can drop. Aeration systems include:
- Air Pumps: These use an air pump and diffusers to add oxygen directly to the water.
- Waterfalls and Fountains: These features not only add beauty but also help aerate the water as it flows and splashes.
Using the right pump and aeration system will keep the water in your Koi pond well-oxygenated and moving, promoting a healthy environment for your fish.
Excavation Process
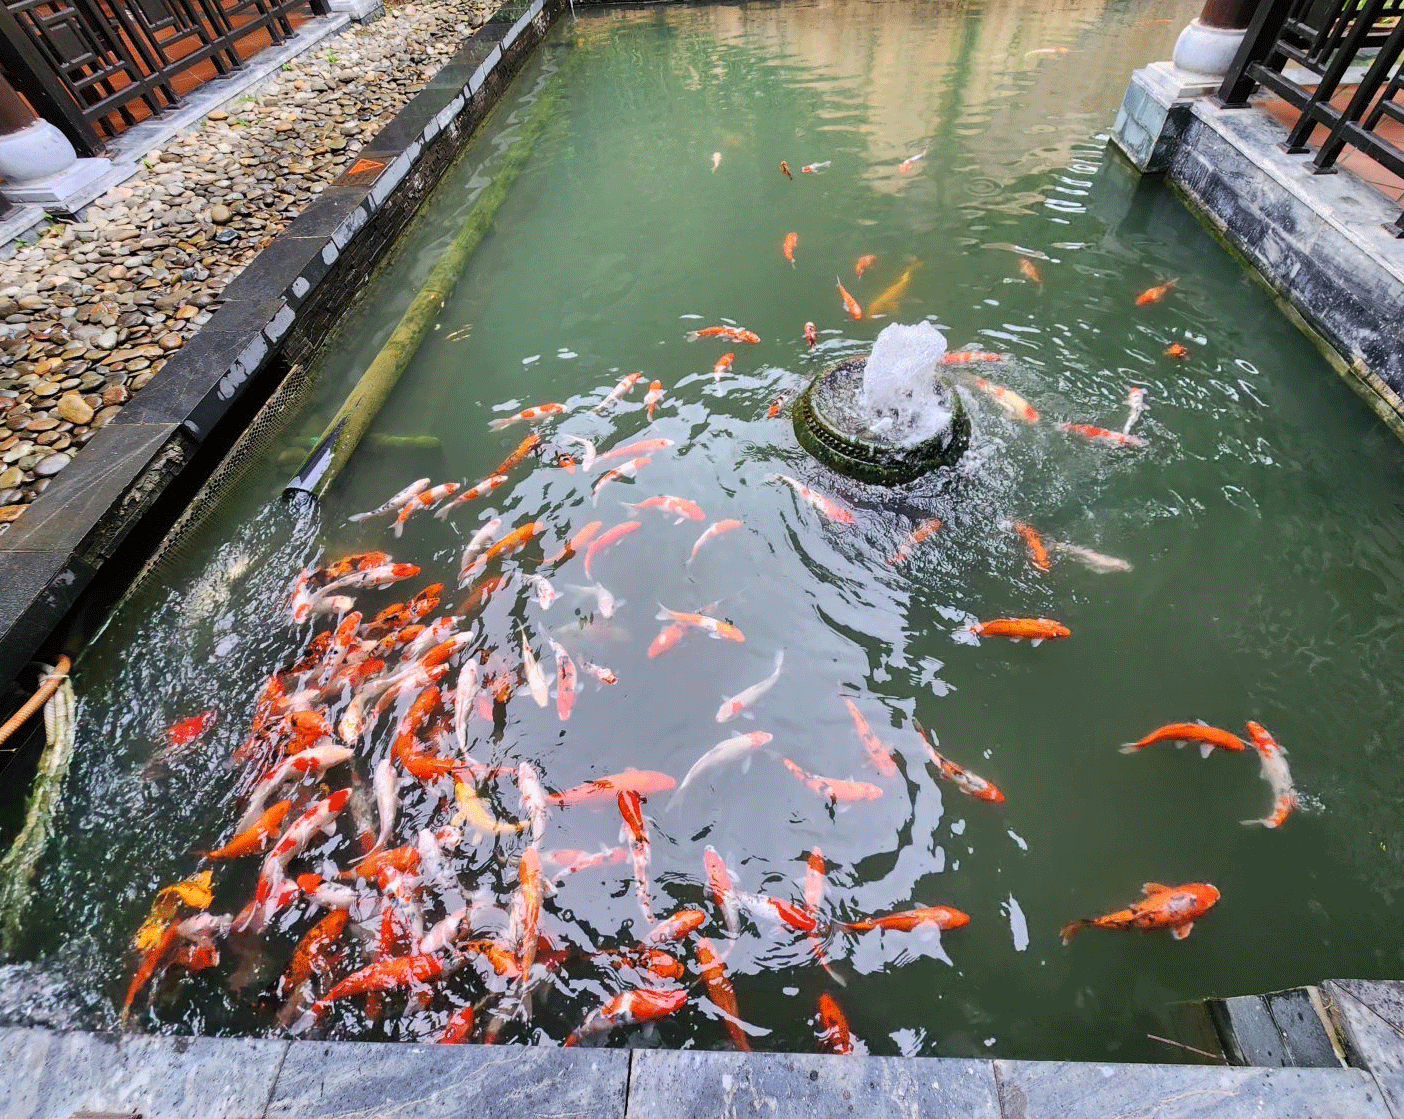
Building a koi pond is a rewarding project that brings tranquility to your garden. The excavation process is a crucial step that lays the foundation for your pond. Proper excavation ensures your pond is safe for koi and minimizes maintenance. Let’s dive into the tools and steps needed for a successful excavation.
Tools Needed
Before you start digging, gather all necessary tools. The right tools make the job easier and faster. Here’s a list of what you’ll need:
- Shovel: Essential for digging and moving soil.
- Pickaxe: Useful for breaking up hard ground.
- Wheelbarrow: Helps transport soil away from the site.
- Measuring Tape: Ensures accurate dimensions.
- Spray Paint: Marks the outline of your pond.
- Level: Checks the evenness of the pond base.
- String and Stakes: Helps outline the pond shape.
- Garden Hose: Marks the pond shape if spray paint isn’t available.
Gather these tools before you start. This preparation saves time and avoids interruptions.
Steps For Digging
Follow these steps to ensure a smooth excavation process:
- Mark the Area: Use stakes and string or a garden hose to outline the pond shape. Ensure the dimensions are accurate with measuring tape.
- Spray Paint: Mark the outline on the ground with spray paint. This visual guide helps you stay within the planned area.
- Remove Grass: Use a shovel to remove the grass and topsoil. This layer is typically around 4 inches deep.
- Start Digging: Begin digging within the marked area. Dig to the desired depth, usually 2-3 feet for koi ponds. Make the sides slope gently to prevent collapse.
- Create Levels: Koi ponds benefit from varying depths. Dig deeper sections for koi to retreat in hot weather and shallower areas for plants.
- Check Levels: Use a level to ensure the pond base is even. An uneven base can cause water to drain improperly.
- Remove Rocks: Clear out any rocks or debris that could damage the pond liner. Smooth out the pond bottom and sides.
- Final Adjustments: Check the shape and depth one last time. Make any necessary adjustments before moving to the next step.
These steps help you dig a well-structured koi pond. Take your time to ensure accuracy and stability.
Installing The Pond Liner
Building a koi pond is an exciting project that adds beauty and tranquility to your garden. One of the most crucial steps in this process is installing the pond liner. The liner acts as a barrier to keep water from seeping into the ground. Choosing and installing the right liner is essential for a successful koi pond.
Liner Types
When selecting a pond liner, there are several options to consider. Each type has its own advantages and disadvantages. Here are the most common choices:
- EPDM Rubber: This is a popular choice due to its flexibility and durability. It can withstand extreme temperatures and is resistant to UV rays.
- PVC: Less expensive than EPDM, but not as durable. It is prone to cracking in cold weather.
- HDPE: High-density polyethylene is known for its strength and longevity. It is also environmentally friendly.
- LDPE: Low-density polyethylene is more flexible than HDPE, but less durable. It’s a good option for smaller ponds.
Here is a comparison table to help you decide:
| Liner Type | Durability | Flexibility | Cost |
|---|---|---|---|
| EPDM Rubber | High | Very Flexible | Medium |
| PVC | Medium | Flexible | Low |
| HDPE | Very High | Moderate | Medium |
| LDPE | Low | Very Flexible | Low |
Proper Installation Techniques
Installing the pond liner correctly is essential to prevent leaks and ensure the longevity of your pond. Follow these steps for a proper installation:
- Prepare the Pond Area: Remove any sharp objects or debris from the pond bed. Ensure the surface is smooth and level.
- Lay Down Underlayment: Place a layer of underlayment to protect the liner from punctures. This can be a commercial product or a layer of sand or old carpet.
- Position the Liner: Unfold the liner and position it over the pond area. Make sure it extends beyond the pond edges.
- Shape the Liner: Carefully press the liner into the pond, ensuring it fits snugly into all corners and contours. Avoid stretching the material.
- Fill the Pond: Begin filling the pond with water. The weight of the water will help settle the liner into place. Adjust the liner as needed to avoid wrinkles.
- Trim Excess Liner: Once the pond is full, trim any excess liner, leaving a few inches around the edge for securing.
- Secure the Edges: Use rocks or other decorative elements to secure the liner edges and prevent it from slipping.
By following these techniques, you ensure a well-installed pond liner that will provide a safe environment for your koi and a beautiful feature for your garden.
Filling The Pond
Creating a koi pond in your backyard can be a delightful and rewarding experience. One crucial step in this process is filling the pond with water. This step is not as simple as just turning on the hose. Proper water quality and pH balance are essential for the health and happiness of your koi fish.
Water Quality Considerations
The quality of the water in your koi pond significantly affects the wellbeing of your fish. Here are some important factors to consider:
- Source of Water: Use clean, fresh water from a reliable source. Avoid water that contains chlorine or other harmful chemicals.
- Temperature: Ensure the water temperature is suitable for koi fish. Ideally, it should be between 65°F and 75°F.
- Oxygen Levels: Koi fish require well-oxygenated water. Consider installing an aeration system to maintain optimal oxygen levels.
Check the water clarity regularly. Cloudy or murky water can indicate poor quality and may harm your fish.
| Water Quality Parameter | Ideal Range |
|---|---|
| Temperature | 65°F – 75°F |
| Oxygen Levels | 5-11 mg/L |
| Clarity | Clear |
Test And Balance Ph Levels
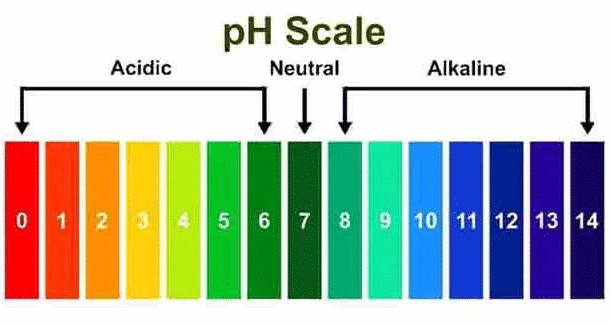
Maintaining the correct pH level is crucial for the health of your koi fish. The ideal pH range for a koi pond is between 7.0 and 8.0. Here’s how to test and balance the pH levels:
- Test the pH: Use a reliable pH testing kit. Dip the test strip in the water and compare it to the chart provided.
- Adjust pH if Necessary: If the pH level is too low or too high, you need to adjust it. Use pH increasers or decreasers available at pet stores.
- Monitor Regularly: Regularly check the pH levels to ensure they remain within the ideal range.
Sudden changes in pH can stress the fish. Make adjustments gradually to avoid shocking them. Keep a log of pH readings to track any changes over time. This can help identify potential issues early.
| pH Level | Action Needed |
|---|---|
| Below 7.0 | Add pH increaser |
| Above 8.0 | Add pH decreaser |
Proper pH balance is vital for the overall health and longevity of your koi pond.
Adding Plants And Decorations
Building a koi pond can be a rewarding experience. One important aspect to consider is adding plants and decorations. These elements enhance the pond’s beauty and provide essential benefits for your koi. The right plants and decorations create a balanced ecosystem, offering shade, oxygen, and hiding spots.
Selecting Aquatic Plants
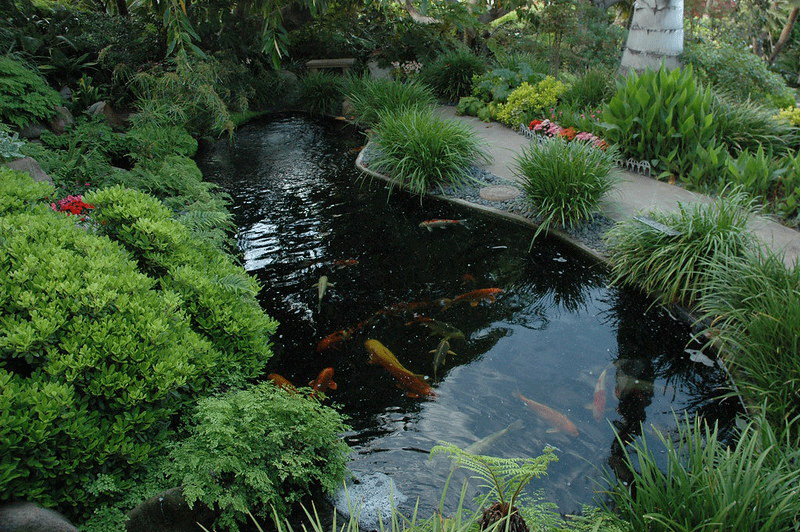
Choosing the right aquatic plants is crucial for a healthy koi pond. These plants help maintain water quality and provide natural filtration. Here are some popular options:
- Water lilies: They offer shade and shelter for koi.
- Lotus: Known for their large, beautiful flowers.
- Water hyacinths: Effective at absorbing excess nutrients.
- Anacharis: Oxygenates the water and provides cover.
- Hornwort: Helps control algae growth.
Each plant has specific needs and benefits. Use a mix to create a balanced environment. Consider factors like sunlight, water depth, and temperature.
| Plant | Sunlight | Water Depth | Temperature |
|---|---|---|---|
| Water lilies | Full sun | 1-4 feet | 70-80°F |
| Lotus | Full sun | 2-4 feet | 75-85°F |
| Water hyacinths | Full sun | Floating | 70-85°F |
| Anacharis | Partial shade | 2-3 feet | 60-75°F |
| Hornwort | Partial shade | 1-3 feet | 60-75°F |
Creating Natural Hiding Spots
Natural hiding spots are vital for koi health. They offer protection from predators and reduce stress. Use rocks, plants, and other decorations to create these areas. Consider these options:
- Rocks and boulders: Place them strategically to form caves and crevices.
- Driftwood: Adds aesthetic value and provides shelter.
- Plant clusters: Group plants to create dense areas for hiding.
- Pond decorations: Use artificial caves and tunnels.
Ensure hiding spots are spread throughout the pond. This allows koi to find refuge quickly. Here are some tips for creating effective hiding spots:
- Variety: Use different materials like rocks, wood, and plants.
- Placement: Spread them evenly around the pond.
- Size: Ensure spots are large enough for koi to fit comfortably.
- Accessibility: Make sure koi can easily enter and exit.
Creating natural hiding spots enhances the pond’s beauty and supports koi health.
Introducing Koi Fish
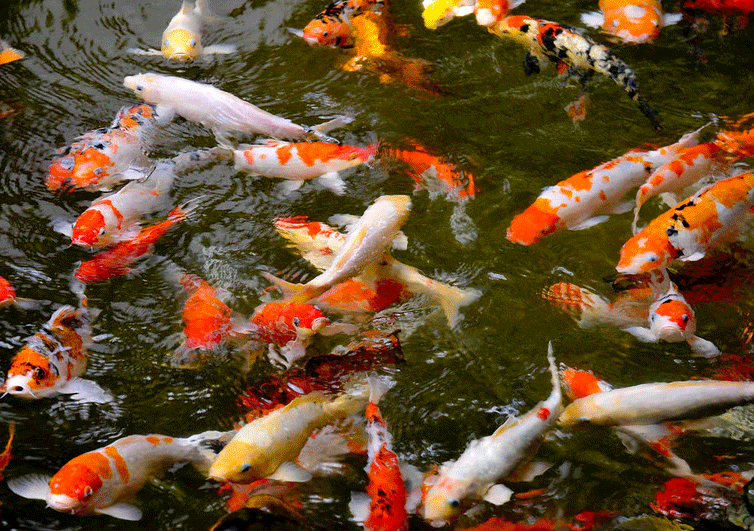
Building a koi pond can be a rewarding experience. Koi fish are beautiful and can bring peace to your garden. Before you start, it’s important to understand how to introduce koi fish to your pond. This guide will help you choose healthy fish and acclimate them properly.
Choosing Healthy Fish
Selecting healthy koi is crucial for a thriving pond. Here are some tips to help you choose the best fish:
- Buy from a reputable dealer: Check reviews and ask for recommendations.
- Inspect the fish: Healthy koi should have bright colors and clear eyes. Avoid fish with visible sores or signs of disease.
- Check their activity: Healthy koi are active and swim gracefully. Lethargic fish may be unwell.
- Quarantine new fish: Before introducing them to the pond, keep new fish in a separate tank for two weeks. This helps prevent the spread of disease.
When examining koi, look for the following signs of good health:
| Feature | Healthy Sign |
|---|---|
| Skin | Bright, shiny, and free of blemishes |
| Fins | Fully extended and undamaged |
| Eyes | Clear and bright |
| Behavior | Active and responsive |
Choosing healthy fish ensures your pond remains vibrant and beautiful. It’s worth taking the time to select the best.
Acclimating Koi To The Pond
Proper acclimation is essential for the health of your koi. Follow these steps to introduce your fish to their new home:
- Float the bag: Place the sealed bag with the koi in the pond for 15-20 minutes. This helps the water inside the bag reach the pond’s temperature.
- Add pond water: After 20 minutes, open the bag and add a cup of pond water. Wait another 10 minutes and repeat this process twice. This helps the koi adjust to the pond’s water chemistry.
- Release the fish: Gently release the koi into the pond. Avoid pouring the bag’s water into the pond to prevent contamination.
During the first week, monitor the koi closely. Look for signs of stress, such as clamped fins or erratic swimming. If you notice any issues, consult a fish health expert. Feeding should be light during the first few days. Overfeeding can cause water quality problems and stress the fish. Gradually increase the amount of food as the koi acclimate. Proper acclimation helps your koi adapt to their new environment. It reduces stress and promotes long-term health.
Maintenance Tips
Building a koi pond is a rewarding project. It brings beauty and tranquility to your garden. Yet, maintaining it is key to keeping the fish healthy and the water clear. Here are some essential maintenance tips to ensure your koi pond remains a stunning focal point.
Regular Cleaning Routines
Keeping your koi pond clean is vital. Regular cleaning prevents algae buildup and ensures clear water. Here are some tasks to include in your routine:
- Skim Debris: Use a net to remove leaves and other debris from the water surface daily.
- Check Filters: Inspect and clean the filters weekly. This keeps the water clean and oxygenated.
- Vacuum the Pond Bottom: Use a pond vacuum monthly to remove sludge and sediment from the pond floor.
Regularly checking water quality is also important. Test the water weekly for pH, ammonia, nitrite, and nitrate levels. Keep a log to track changes and address issues promptly.
| Task | Frequency |
|---|---|
| Skim Debris | Daily |
| Clean Filters | Weekly |
| Vacuum Pond Bottom | Monthly |
| Test Water Quality | Weekly |
These tasks may seem frequent, but they will keep your pond healthy and beautiful. Consistency is the key.
Seasonal Care Strategies
Different seasons bring unique challenges for koi ponds. Adjust your maintenance routine to match the changing weather conditions. Spring:
- Deep clean the pond. Remove leaves, debris, and excess algae.
- Check and repair any damage to the pond liner or equipment.
- Gradually start feeding the koi as the water warms.
Summer:
- Monitor water levels. Top off the pond to compensate for evaporation.
- Provide shade to prevent overheating. Use aquatic plants or pond covers.
- Increase aeration. Hot weather reduces oxygen levels in the water.
Autumn:
- Net the pond to catch falling leaves.
- Reduce feeding as the water temperature drops.
- Prepare the pond for winter. Clean filters and test water quality.
Winter:
- Install a pond heater to prevent the water from freezing.
- Stop feeding the koi. They enter a state of dormancy.
- Regularly check the pond for ice and remove any buildup.
Adjusting your care routines to the seasons helps keep your koi healthy and your pond in good condition all year round. Each season has its needs, but with some effort, your pond can thrive.
Frequently Asked Questions
How Deep Should A Koi Pond Be?
A koi pond should be at least 3 feet deep. This depth protects koi from predators and extreme temperatures.
How Much Does It Cost To Build A Koi Pond?
Building a koi pond typically costs between $3,000 and $15,000. The final price depends on size, materials, and features.
How To Build A Koi Pond From Scratch?
To build a koi pond, choose a location, dig a hole, install a pond liner, add a filtration system, and fill with water. Decorate with rocks and plants. Introduce koi fish gradually.
Can Koi Live In A 500 Gallon Pond?
Yes, koi can live in a 500-gallon pond. Ensure proper filtration and regular maintenance. Limit the number of koi to avoid overcrowding.
Building a koi pond brings beauty to your backyard. It’s a rewarding project. You gain a peaceful spot to relax. Nature finds a home in your space. Koi fish add color and movement. Easy steps guide your pond creation. Care and maintenance ensure a thriving ecosystem.
Enjoy watching your koi grow and swim. Share your pond with family and friends. Feel proud of your work. Your koi pond becomes a place of joy. Dive into this project today. Transform your garden into a serene retreat. Embrace the beauty of nature at home.


